
Here’s a quick and free way to create and edit email templates in Gmail without using any extra tools.
Not many know this, but Gmail already has email templates built in. The reason you don’t know about this is that it’s not enabled by default. In this guide, we’ll show you how to enable email templates and use them.
Before you can start creating email templates, you must first enable Templates as functionality through the settings page in Gmail.
You’ll learn how to do that in the steps below.
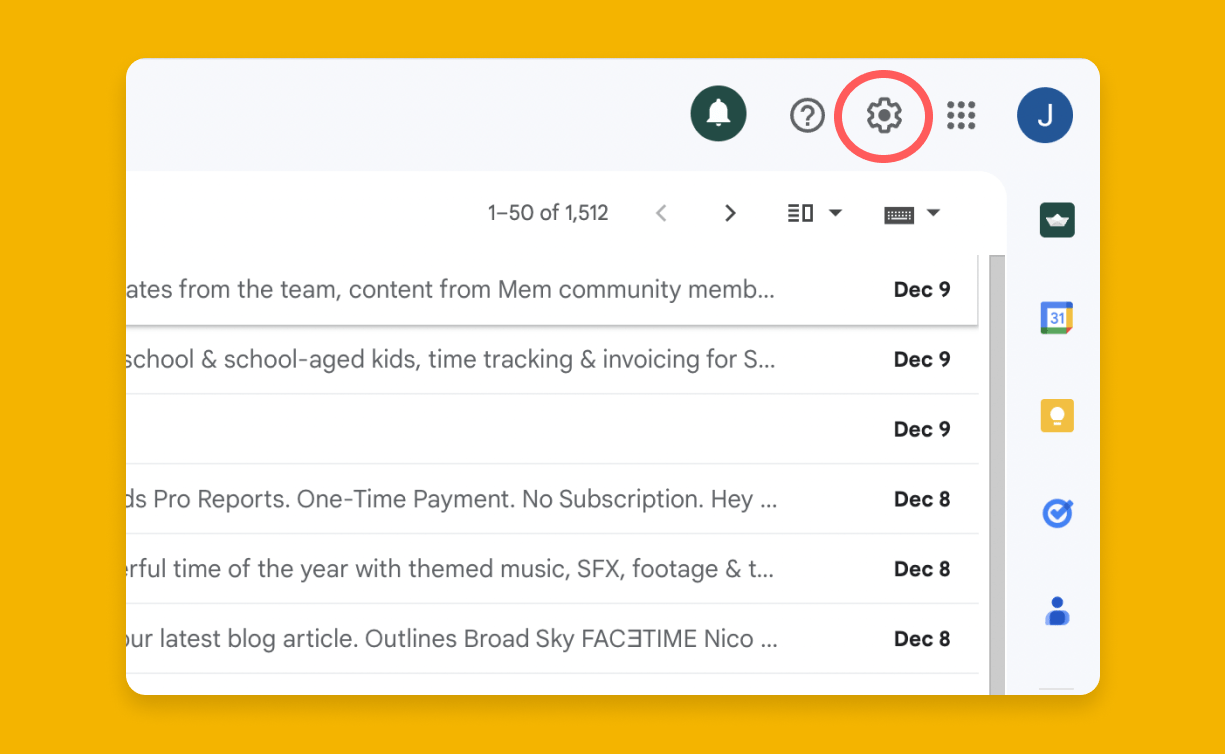
Step 1:
Click the gear icon to open settings.
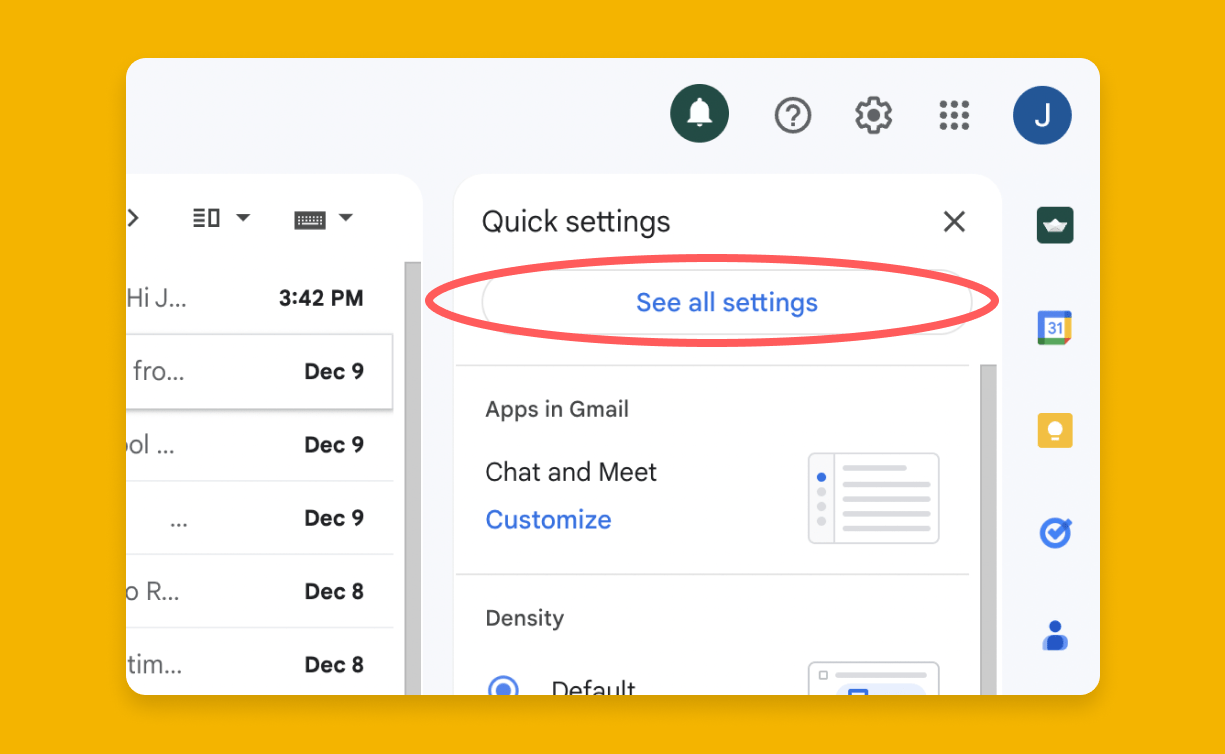
Step2:
Click See all settings.
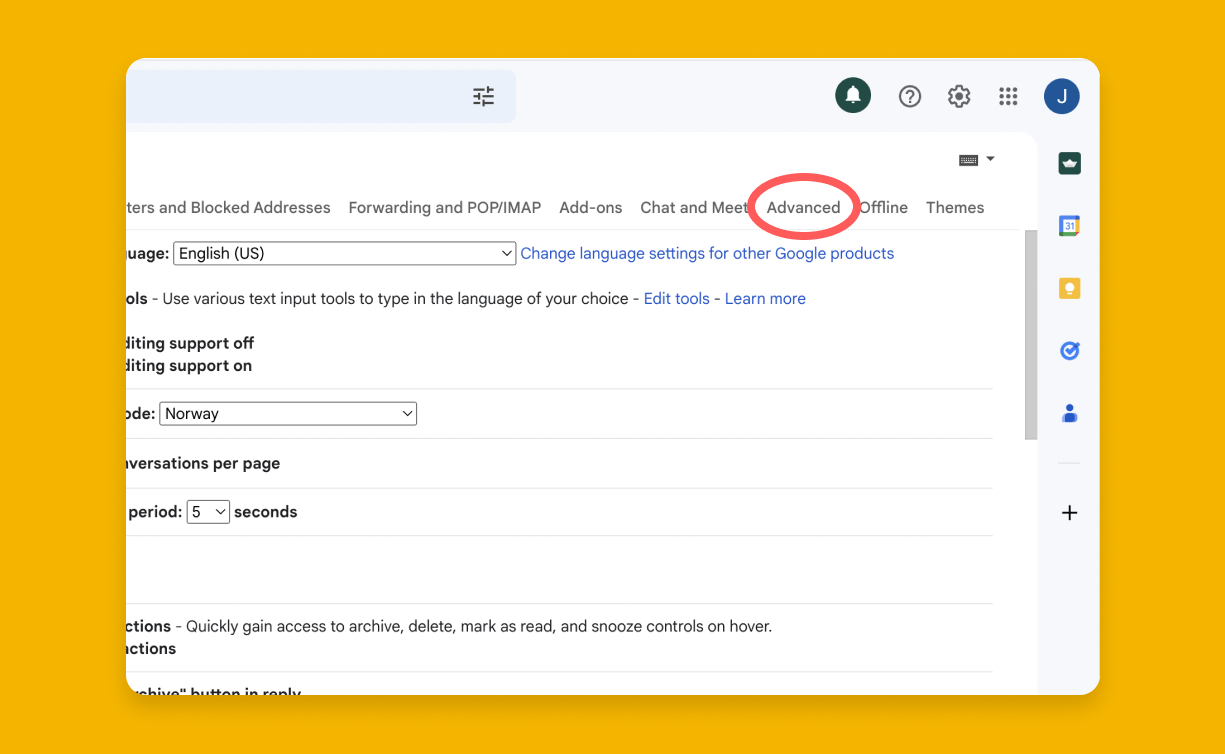
Step 3:
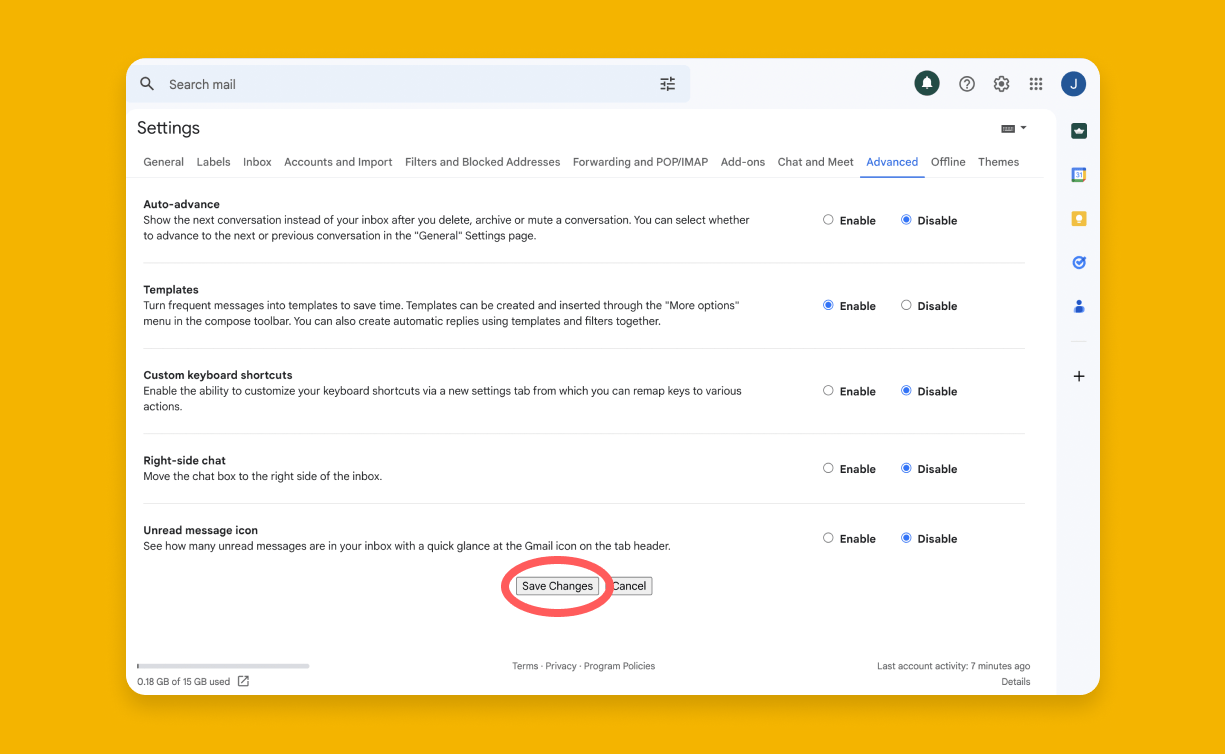
In the settings page, click the Advanced tab.
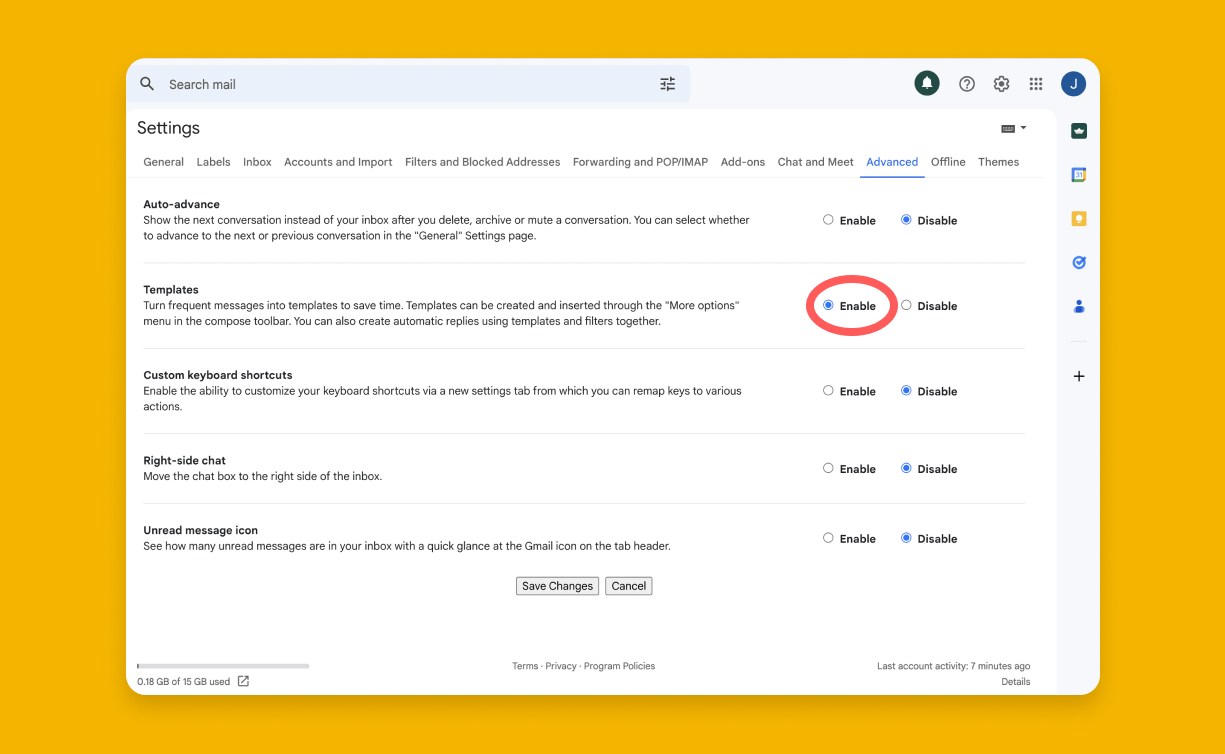
Step 4:
Scroll down and enable Templates by clicking the radio button.
Step 5:
Remember to save. Scroll down and click Save Changes.
That’s it!
You have enabled email templates in Gmail. Next up, let’s see how to make templates.
Step 1:
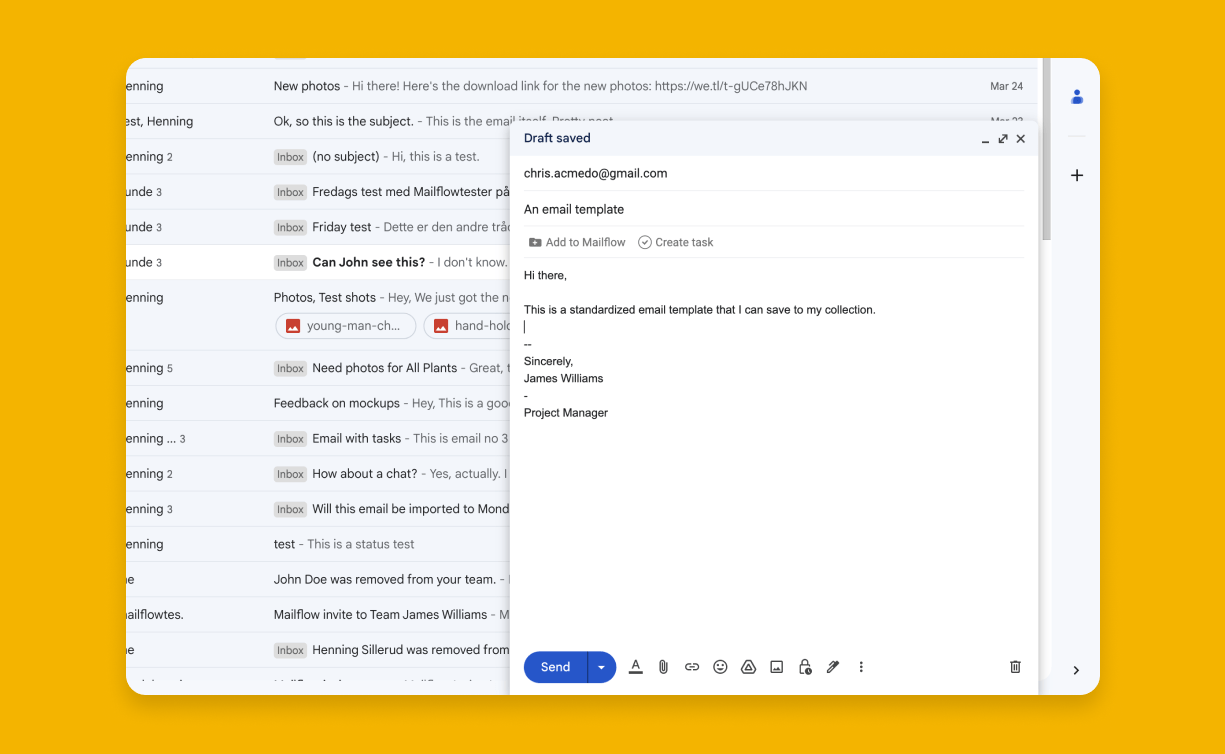
Start writing a new email and type the message you want to use as a template.
Step 2:
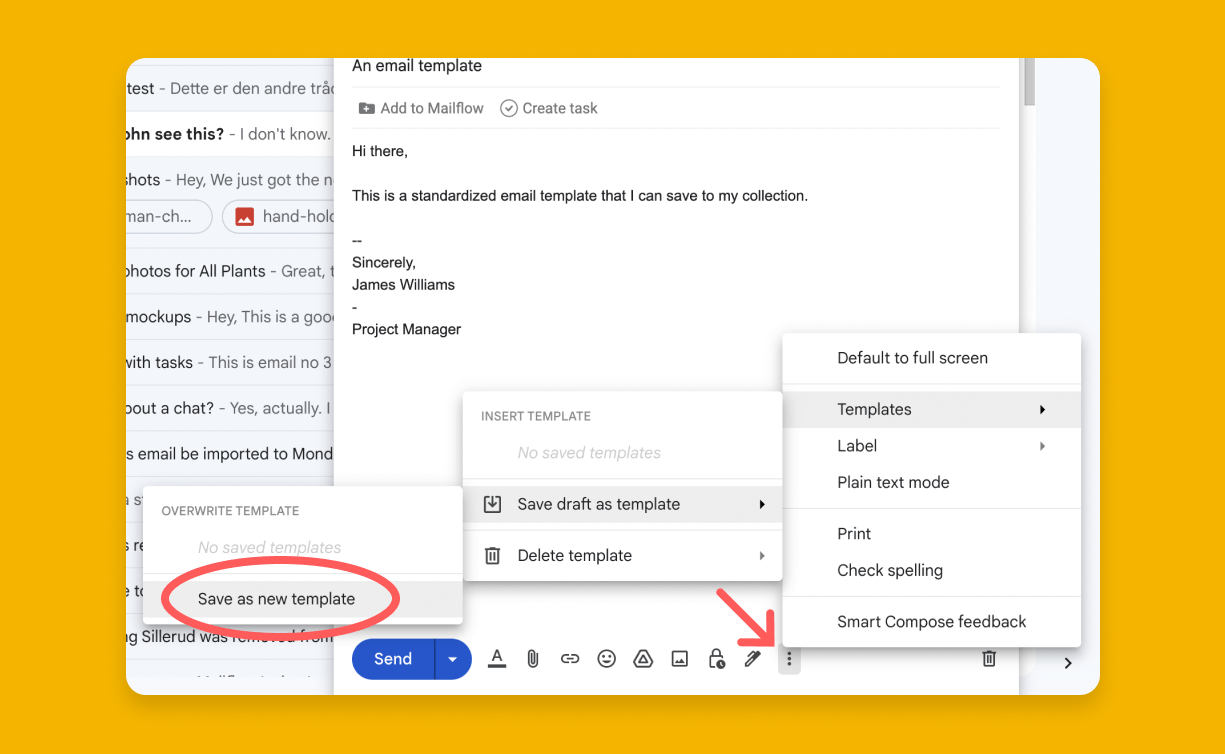
Click the three dots at the bottom of your compose window → click Templates → Save draft as template → and then Save as new template.
Step 3:
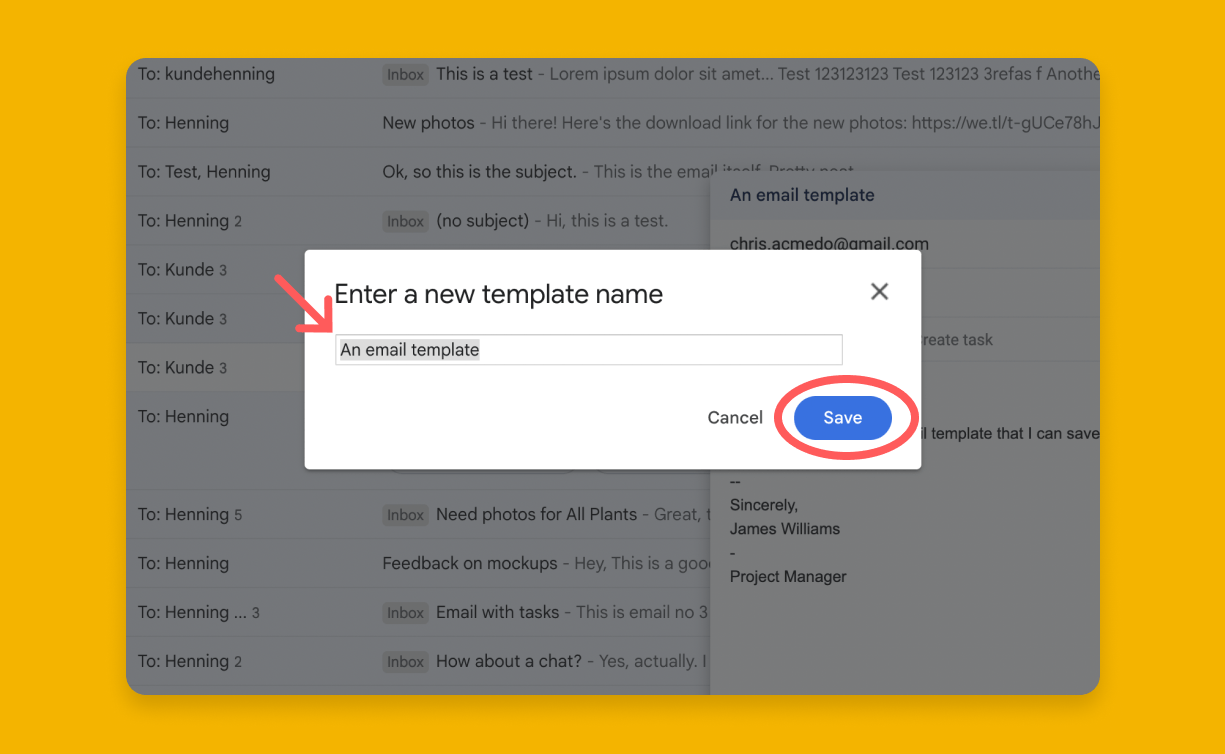
Enter the name of your template and click Save.
All done!
That’s it. The template has been saved and is ready to be used. In the next section, I’ll show you how to use your template the next time you compose an email.
Step 1:
Start composing a new email as you normally would. Click the three dots at the bottom of your compose window. Then you click Templates → And select the template you just created under Insert template.

That’s it!
Your template has been inserted into the body of your email.
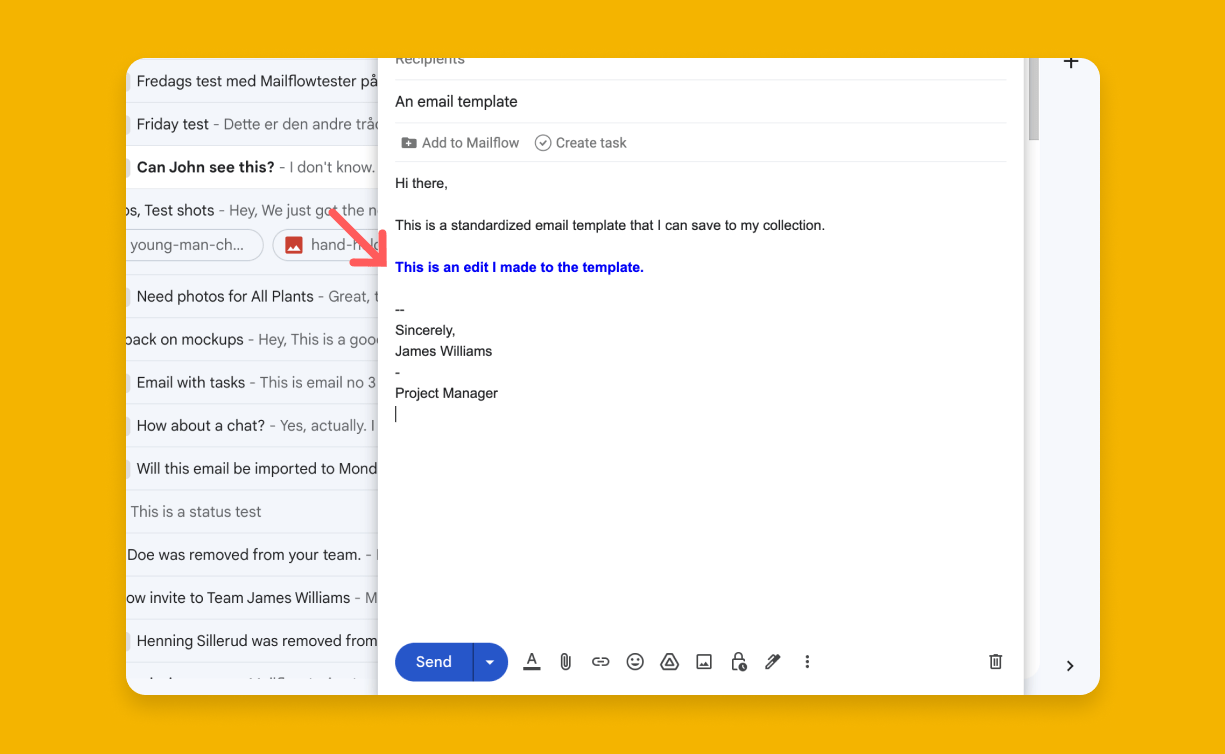
You can edit your email templates by simply overwriting them.
Step 1
If you want to edit an existing template, you must first insert it into your email by following the steps in the previous section.
Step 2:
Make the Changes you want to the template you just inserted.
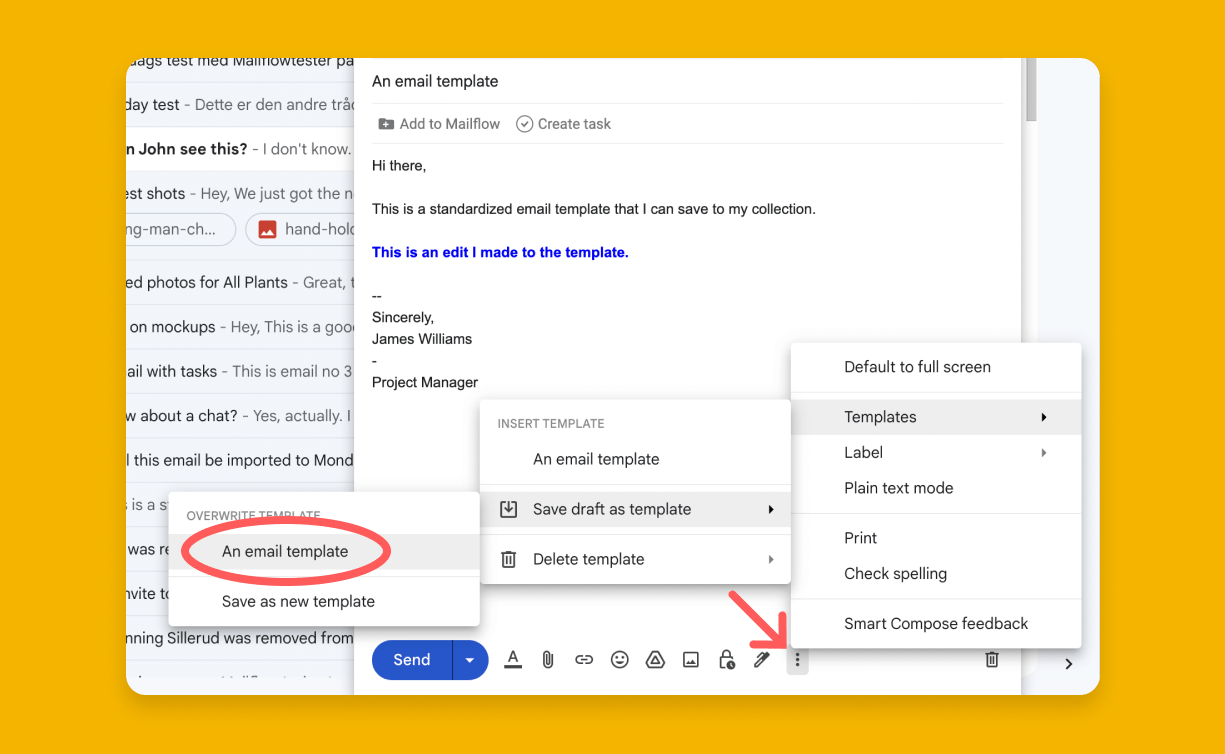
Step 2:
Click the three dots at the bottom of your compose window → then click Templates → Save draft as template → and select the template you want to overwrite.
Step 3:
Click Save in the confirmation message.
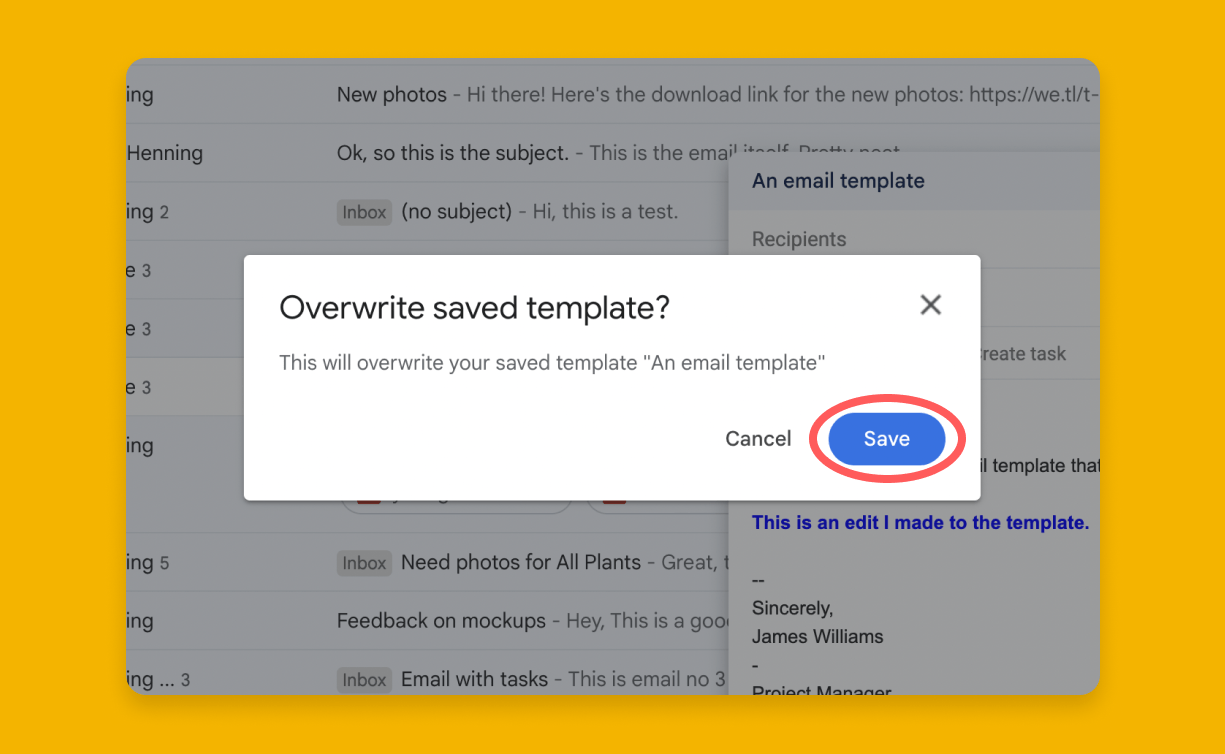
All done!
The previous email template has been overwritten and is ready to be used.